


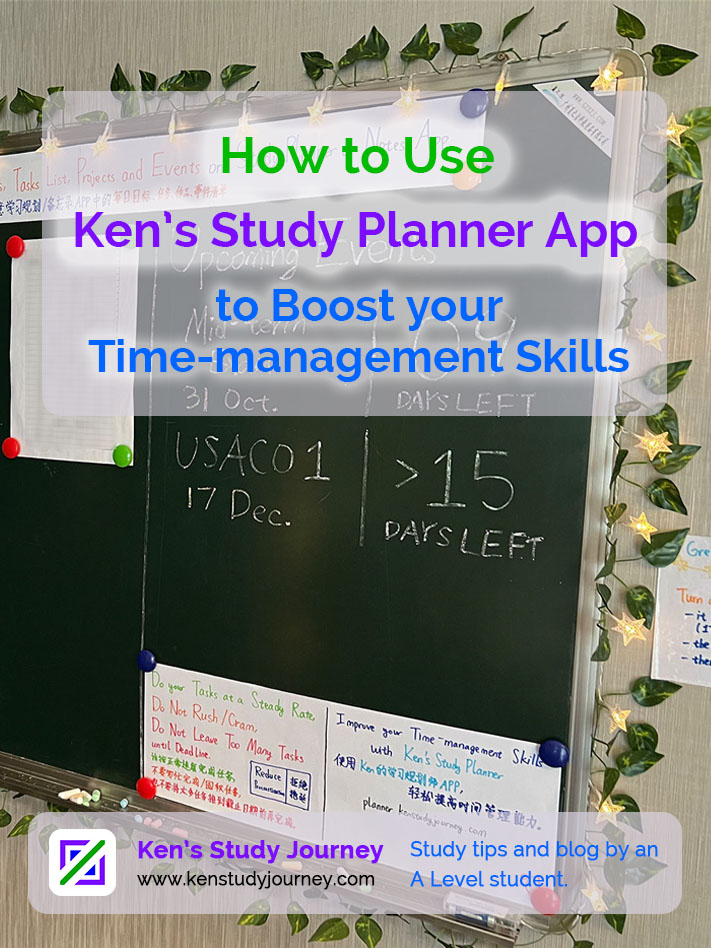
Ken's Study Planner integrated daily goals checklist, projects and events trackers, schedule and checklists. I always use it to boost my time-management skills.
I use it to plan my study and exams, manage my daily goals, lessons and items checklists, and so on.
Since I am a student with programming skills, I have made my website and this web-based Planner app to solve my planning difficulties.
Today, I am going to teach you how to use my Study Planner web app to boost your time-management skills. Follow me!
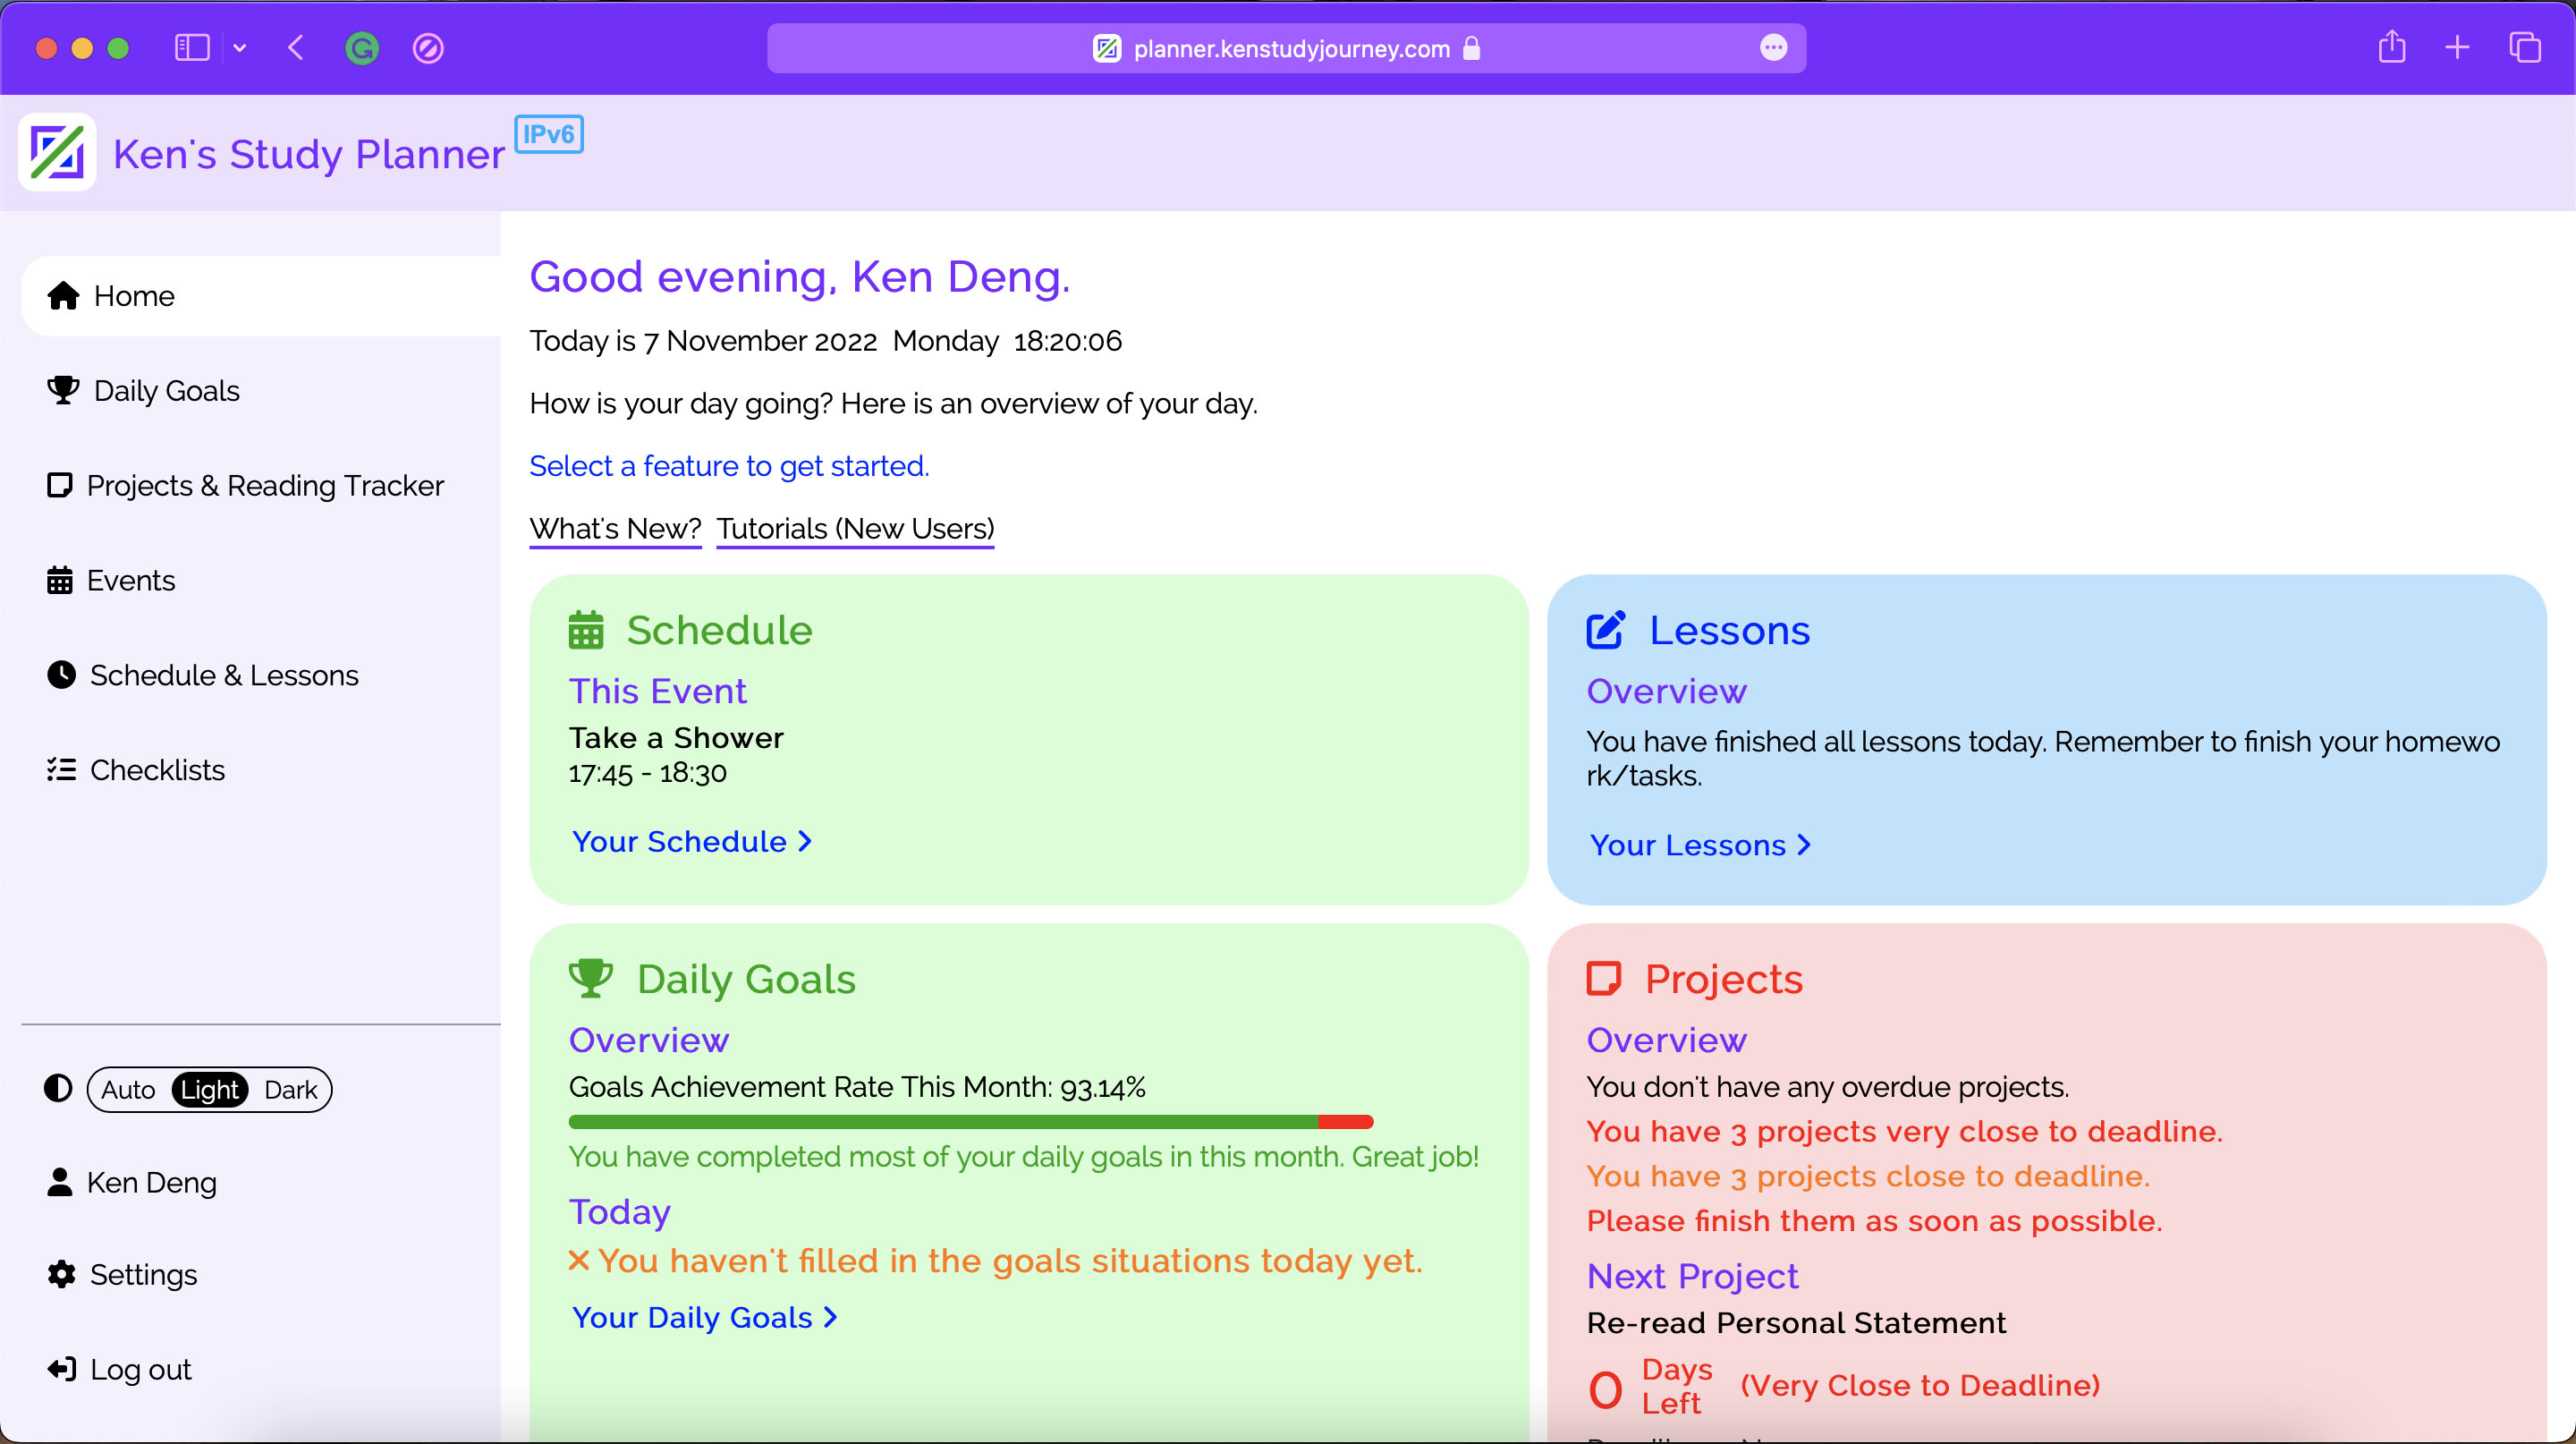
Ken's Study Planner Home Page
Introduction
Before starting my tutorial, let's introduce Ken's Study Planner itself, including its features and benefits.
General Information
Initially, at the beginning of 2021, my Study Planner was previously called "Personal Management" which could only be used by myself.
The reason why the Study Planner was not available to the public is that it had not only insufficient features but also potential security issues.
Then, in July 2021, I generated a name "Study Planner" and opened it to the public for registration so that everyone around the world can sign up and use it.
Now, there are approximately 30 users on the Study Planner. A major source of users comes from China, plus some users in Singapore, South Africa and Australia.
In other words, it will probably be one of my successful projects.
Benefits
Here, there are some benefits on the planner. For example,
- Dark/Night mode is supported (using Apple system settings),
- Intuitive interface,
- No apps required,
- Free Forever,
- Supports IPv6 networks,
- Has English and Chinese (简体中文) versions. (since I am a Chinese student)
While I am studying, I take my free time to make this app to help me plan my study easily. It is completely free and this is similar to volunteering.
It is like Hurricane Electric, a global Internet backbone company that also provides free services including free IPv6 TunnelBroker and computer networking tools.
Initialising your Planner
Now, I am gonna teach you to sign up for and initialise your planner.
1. Open Study Planner Website
My study planner is on planner.kenstudyjourney.cn. You can click the link to open the app.
Open Study PlannerBe sure to bookmark the website and remember the web address. You will need to use it every day to see and update your status.
Internet Explorer (IE) is not supported on Ken's Study Planner. Please use the latest browsers like Chrome, Firefox, Microsoft Edge and Safari.
2. Sign Up for an Account
Scroll down and click "Sign Up" button. Read the privacy notice carefully and click "Agree and Continue".
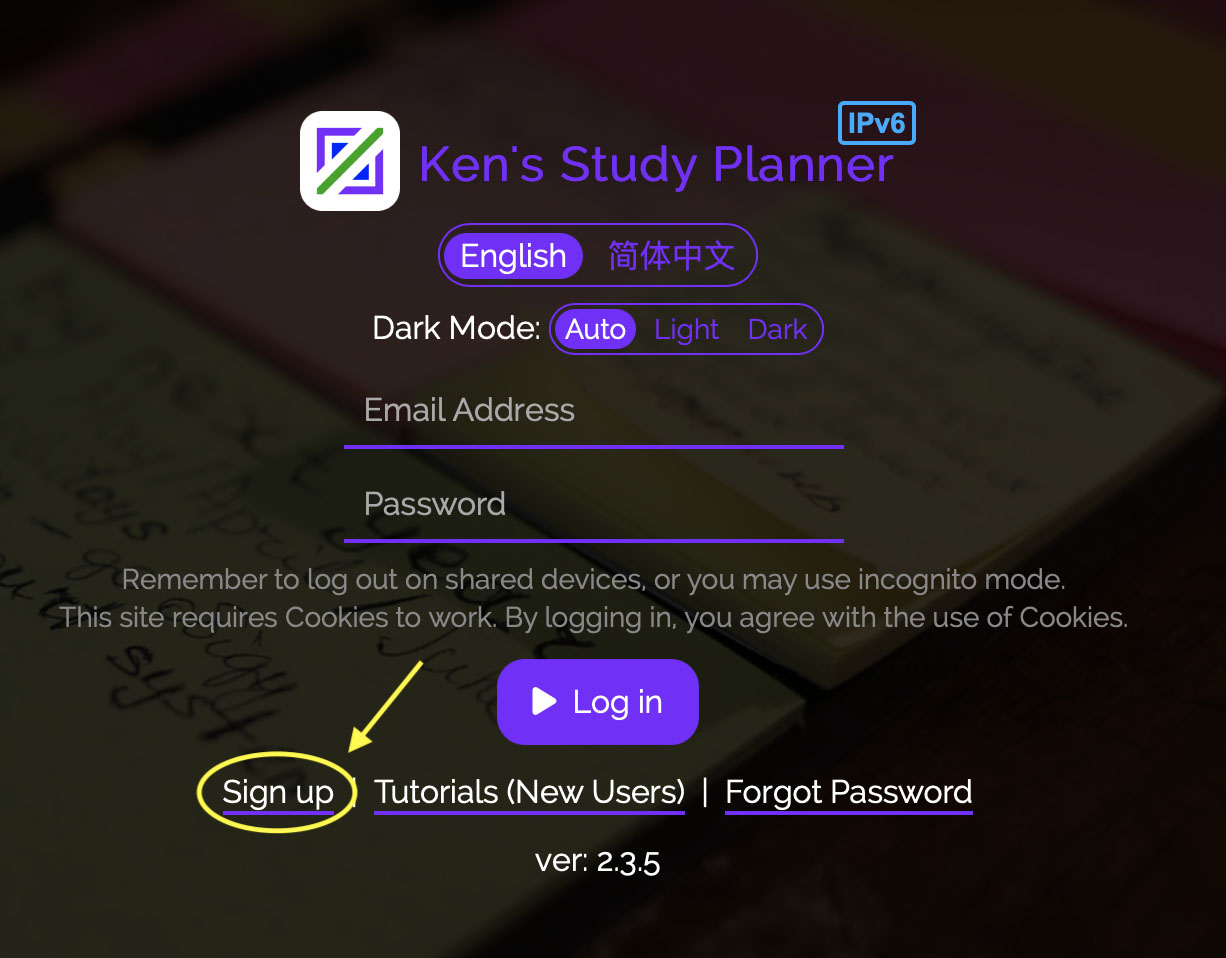
Sign Up to Ken's Study Planner
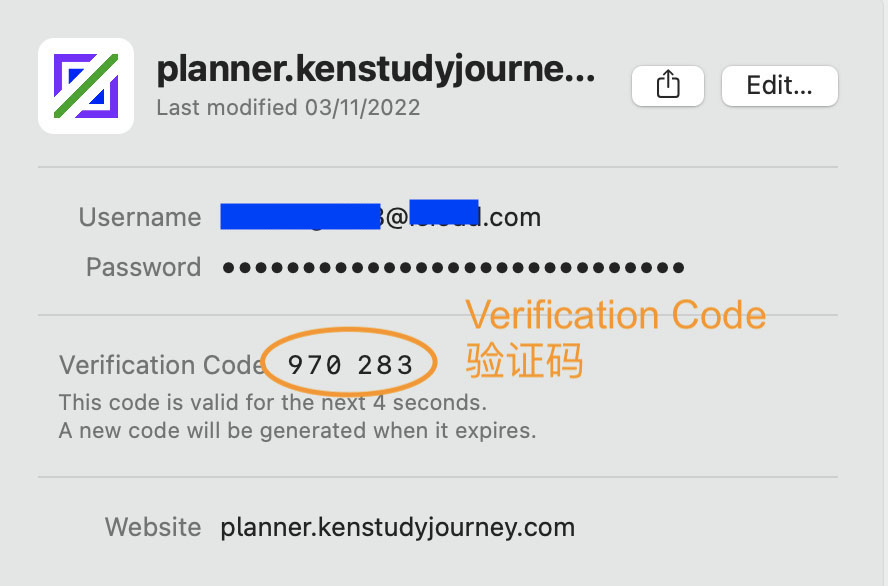
Fill in your details such as email address, password and name/nickname. Check your email inbox and fill in your verification code. Then click "Sign Up".
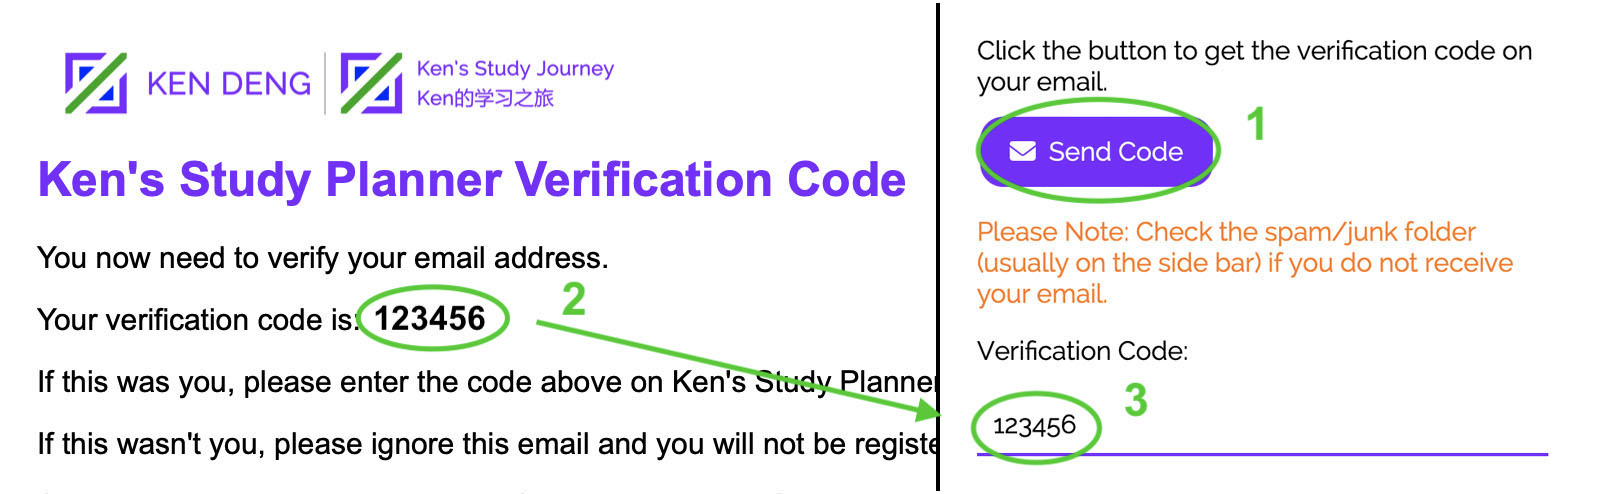
Fill in Email Verification Code
After that, click "Sign in" button and sign in to your account.
3. Fill in your Daily Goals for This Month
Click "Daily Goals Checklist" on the sidebar. Then click "Set/Modify Goals".
Fill in your daily goals for this month, then click "Submit". You can refer to my daily goals.
View my Latest Goals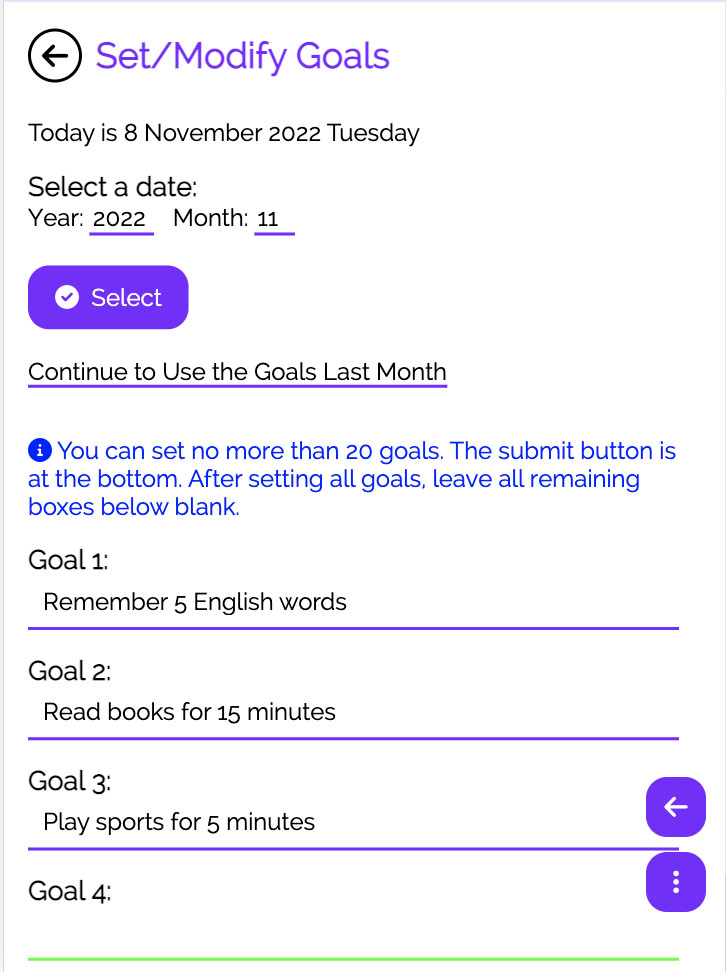
Set Daily Goals
To make your goals achievable, you can start your new goals with the smallest amount (e.g. read books for just 5 minutes a day). Then you can increase them every month.
You need to set goals every month. You can adjust your goals when necessary.
You also can fill in some emojis throughout the planner if you want, such as 👕 📆.
Remember to fill in your goals situations every day after setting your goals.
4. Fill in your Projects and Books
Then, you can fill in your projects, such as your homework or EPQ project, plus some books you have been reading.
Click the "Projects & Reading Tracker" on the sidebar. Then click the "Add" button, fill in the names and the dates of deadlines. You also can fill in the total pages or questions in advance.
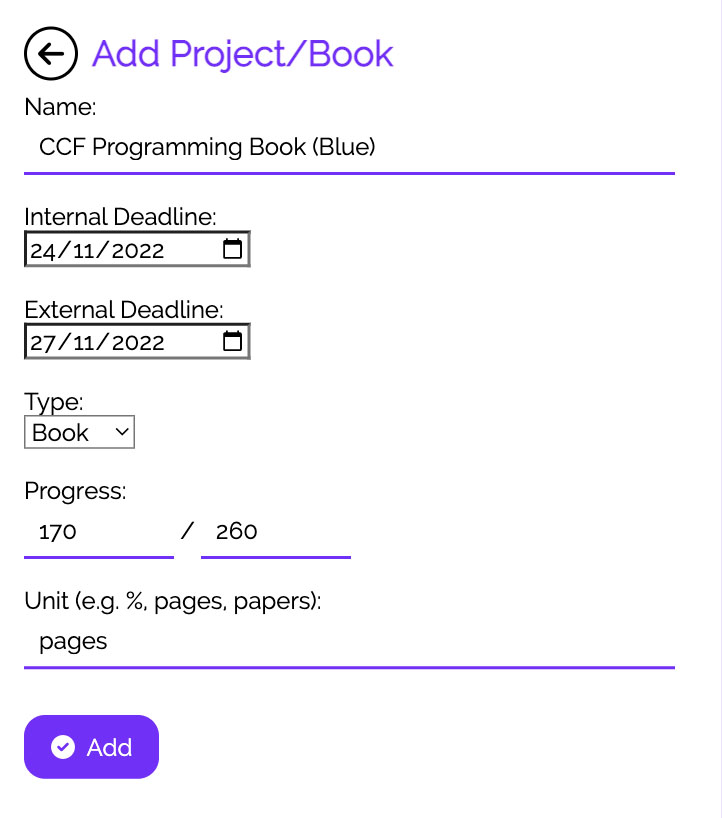
Add a Project/Book on Study Planner
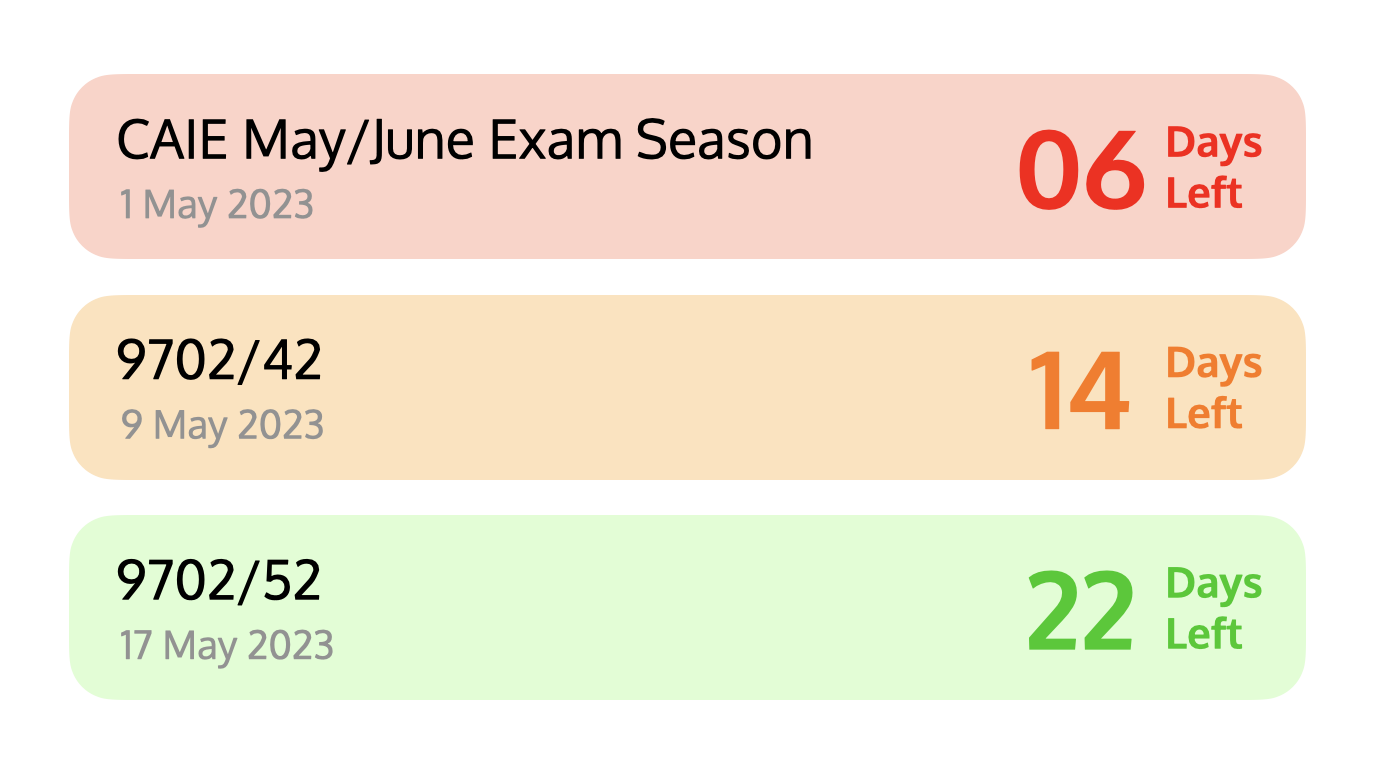
5. Fill in your Events (Exams and Activities)
Then you can fill in your events.
There is special a feature on the Study Planner that counts and displays the Days Left until your next exam or event.
It is similar to Calendar, but you can use both Planner and Calendar simultaneously.
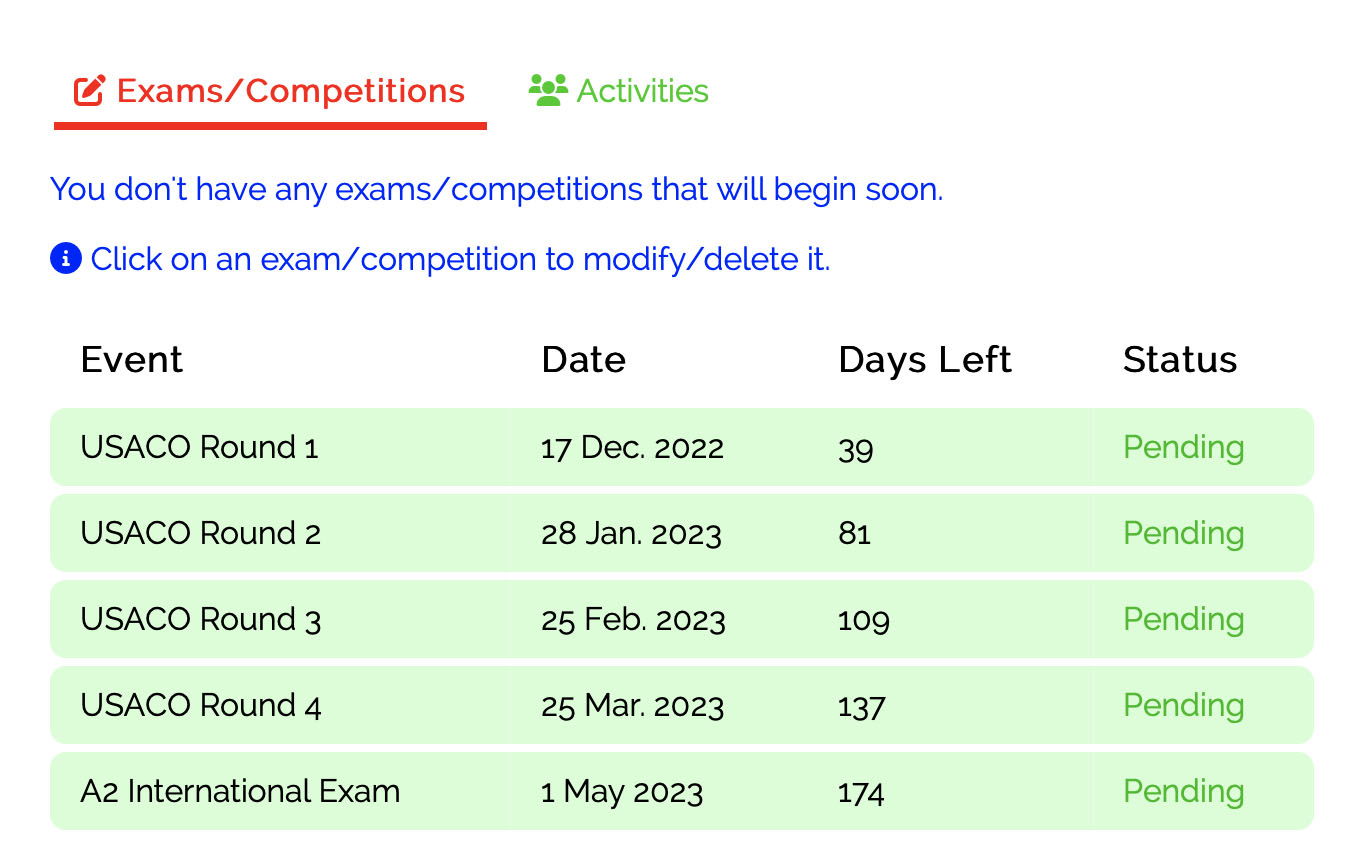
Events List on Study Planner
6. Fill in your Schedule
A new feature on my Planner is the schedule and lessons feature.
It displays your next event and lesson based on your schedule. This is similar to the announcement on the underground (e.g. "The Next Lesson is Mathematics").
Just fill in the time and name. If it is a lesson, you can tick the checkbox.
You need to set up your schedule literally from Monday to Sunday, but you can reuse other day's schedule using the drop-down box on the top and then modify it.
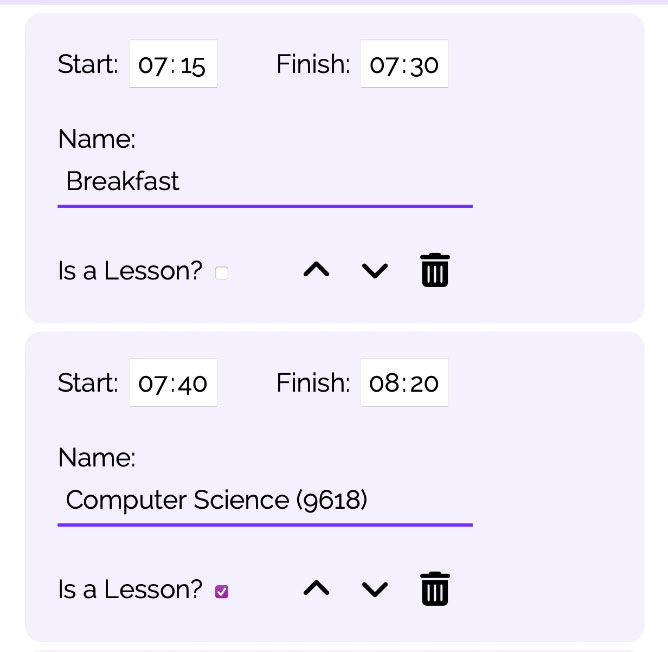
Fill in Schedule on Study Planner
By the way, you can glance at your lessons in the next few days on the "Lessons" tab.
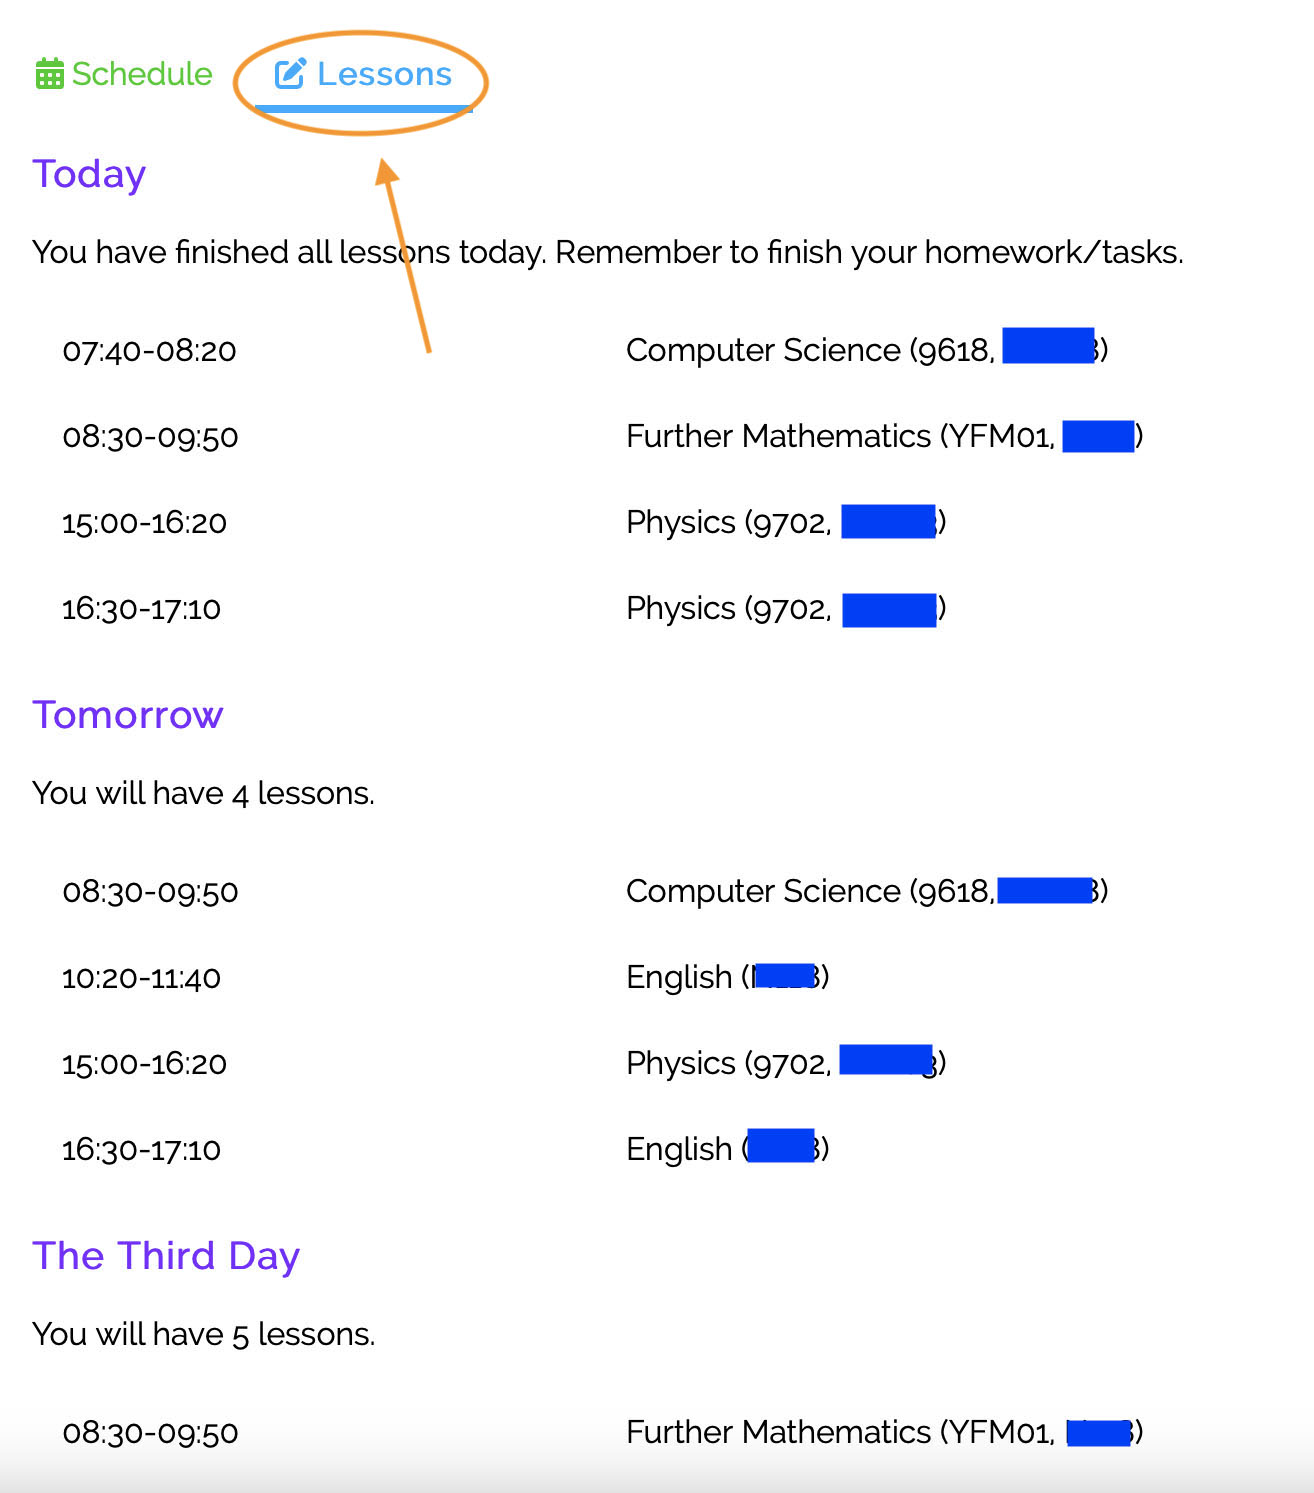
"Lessons" Tab
7. Fill in your Checklists
The last initialisation step is to fill in the checklists.
Click the "Checklists" on the sidebar, and then click "Add New ..." button. Fill in the name (e.g. Morning Routine, Items Checklist for Going to School) and the items. Then click "Submit".
My Items Checklist
Using your Planner
After setting up your Planner, you need to use it on a daily basis to track your study progress.
1. Check your Home Page
You can see your status immediately on the home page.
In the new version, the colours change according to your situation.
Ken's Study Planner Home Page
2. Check Daily Goals
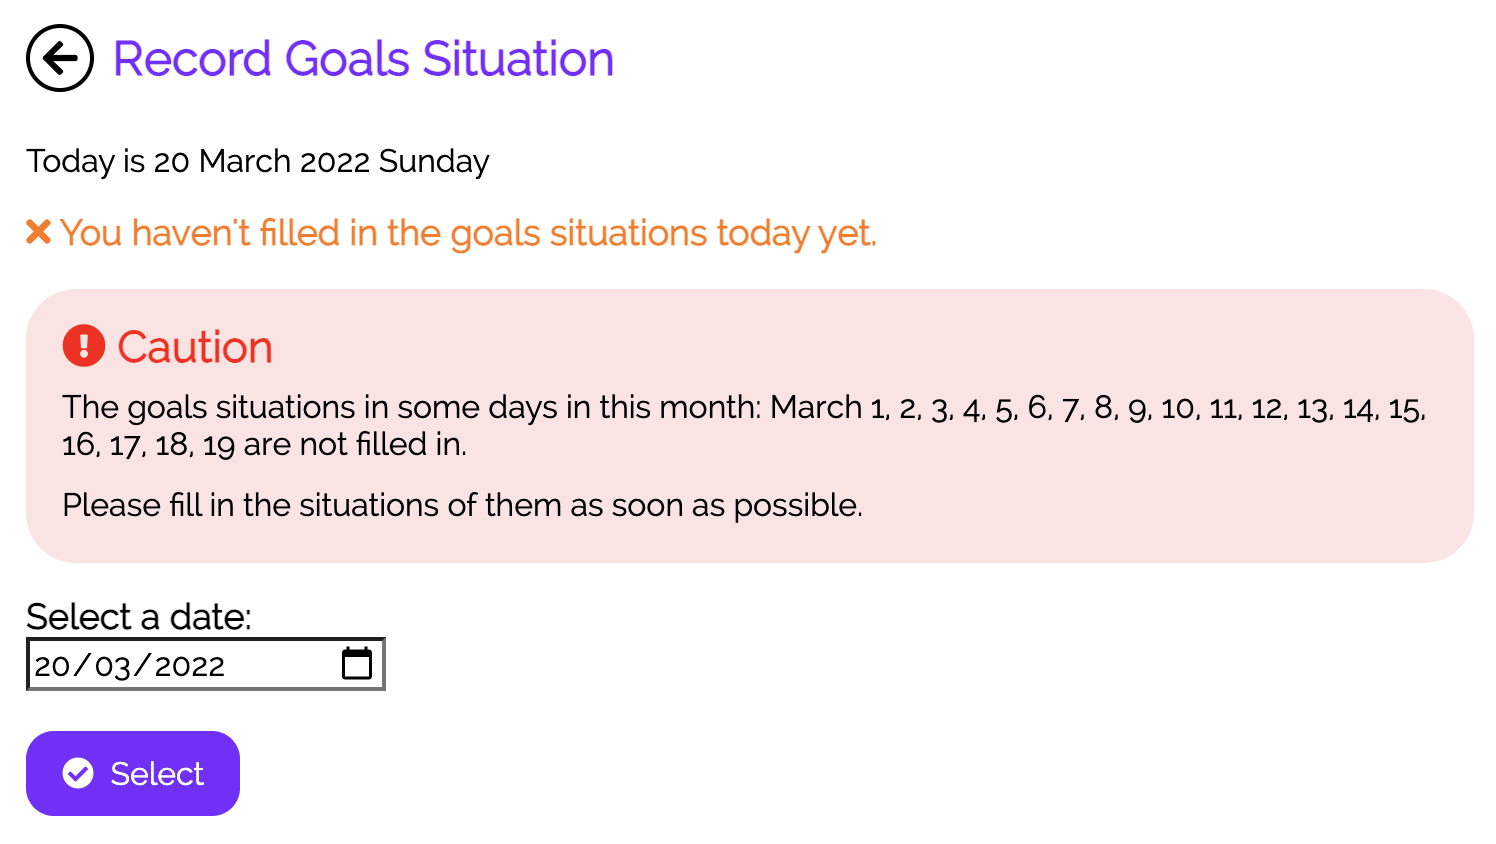
Every evening before sleeping, you need to fill in whether you have achieved your daily goals.
Check Goals on Study Planner
If you forgot to fill in the checklist, you will see a red notice, like the image below, and you can choose a date to fill in later.
At the end of each month (or at any time), you can use the monthly summary feature to view your achievement rate for each goal.
Remember, you need to set your goals every month.

Daily Goals Monthly Summary
3. Check Projects, Books and Events
You can see your upcoming projects on the"Projects & Books Tracker" page as well as their progress bars. Projects with less than 7 days left will be marked as orange, and projects with less than 3 days left will be marked as red.
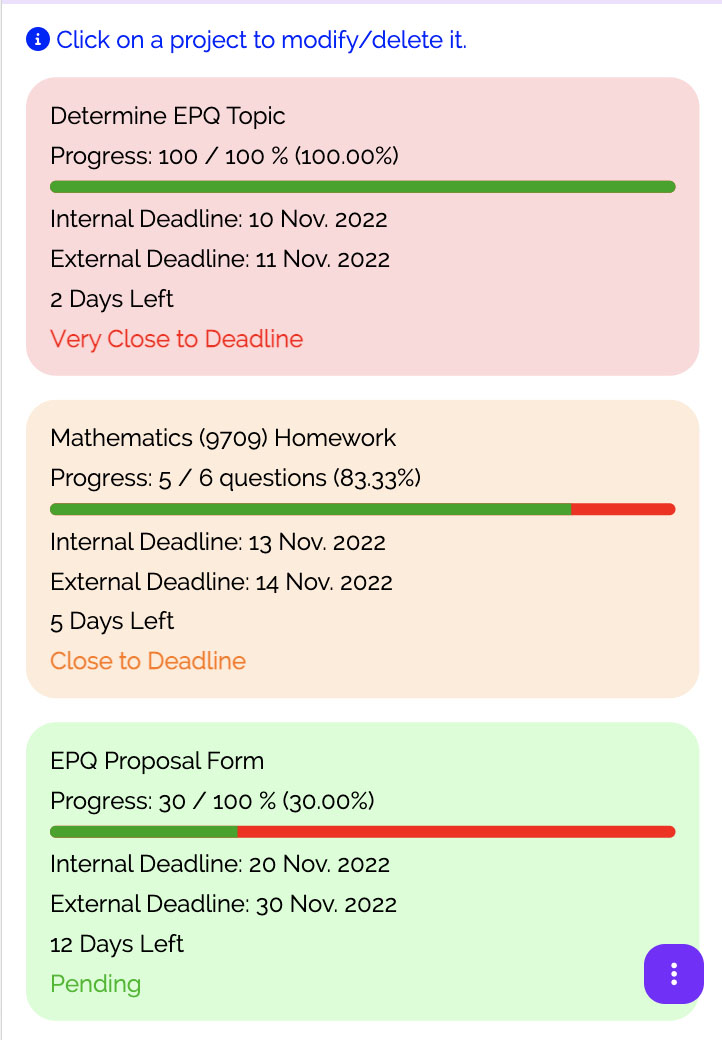
Projects/Books List on Study Planner
Then you can see the calendar and the days left until your next exam, competition and activity on the "Events" page.
4. Check Schedule and Lessons
You also can check your schedule and lessons. The current event or lesson is highlighted in blue or green.
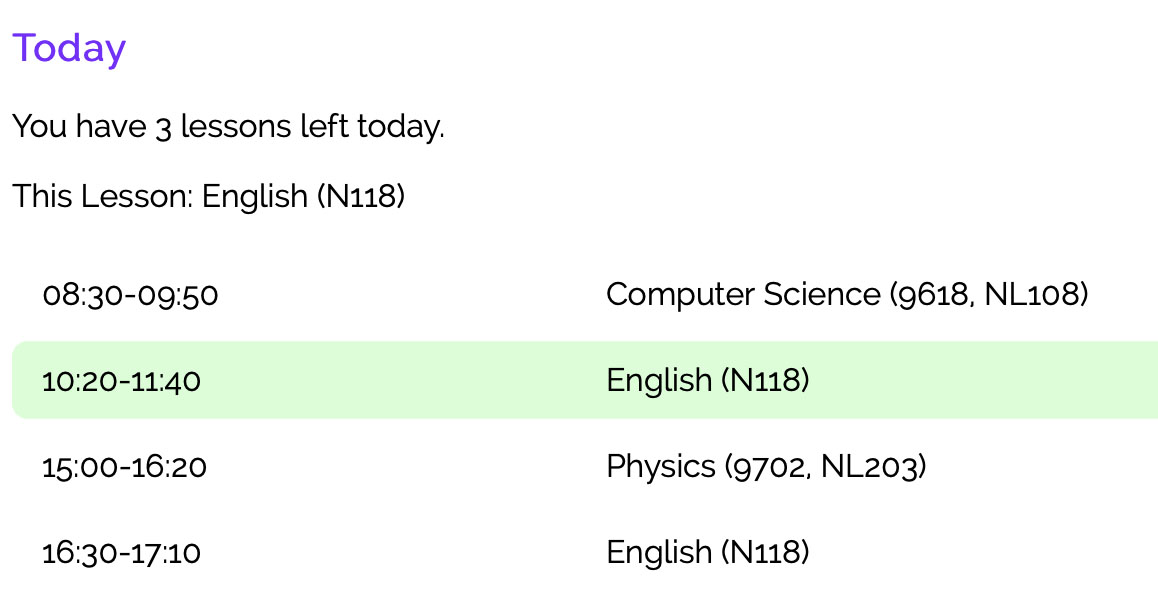
Check Schedule and Lessons
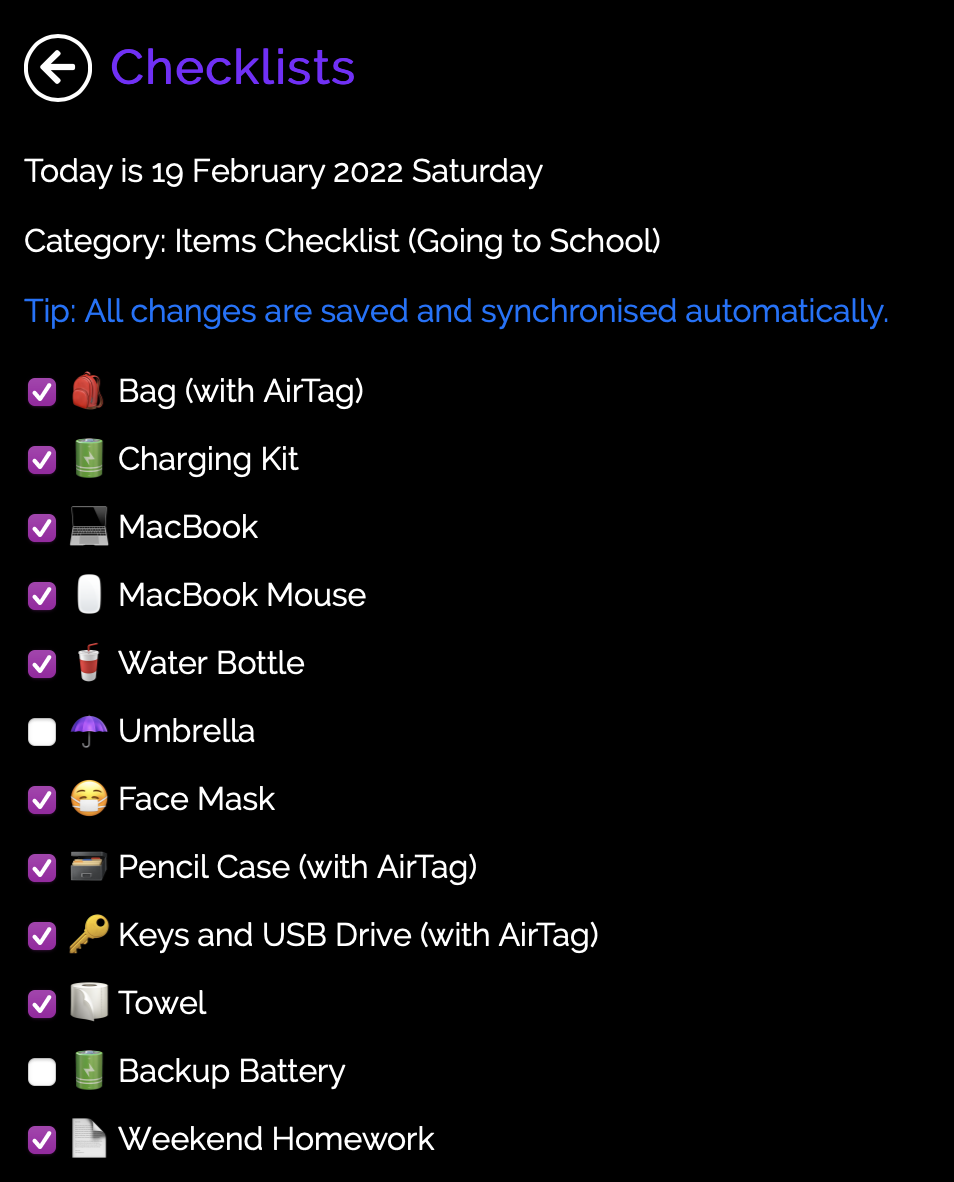
5. Use the Checklist
Use the checklists when you are packing bags and luggage, or completing morning and evening routines.
Tick the boxes and it will be automatically saved to my servers in real time. You can just click "Reset Checkboxes" to clear the ticks.
You can simultaneously use the Planner on multiple devices (e.g. laptop, iPad and phone) and/or open the checklists. They are synchronised in real time.
My Items Checklist
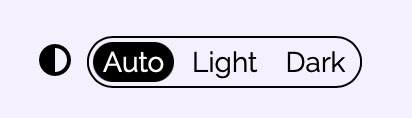
6. Use the Dark Mode
You also can toggle the Dark Mode at the bottom of the menu.
Dark Mode on Study Planner
On some devices, if you choose "Auto", it will use your system settings.
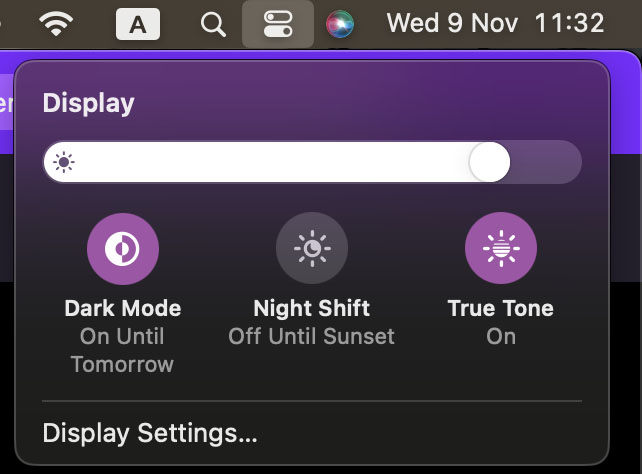
Dark Mode on macOS
7. Customise your Account
In order to enhance your account security, you also can enable Two-factors Authentication on your account in Settings.
You can use Email and Google Authenticator as your authentication methods. This is optional, but it can enhance your account security.
Two-factors Authentication with Apple Authenticator
On iOS/iPadOS 15 and macOS Monterey or later, they have their built-in authenticator. It has the same function as Google Authenticator.
You also can enable login reminder emails and manage your login devices.
In addition, you can change the calendar start day between Sunday and Monday in Settings.
Sign Up and Plan Today
These are the tutorial for using my Study Planner. I hope you can use it and boost your productivity and time-management skills.
If you want to boost your time-management skills, reduce procrastination and sign up today for free.
Once you have set up your planner, you will significantly boost your productivity.
Open Study PlannerExplore More Study Tips
More useful study techniques and habits are available on my website. You can Explore More Study Tips if you want.
If you like this article, please drop a 'like' thumb up below.
You can share and recommend this article to your friends and classmates if you wish, and write comments below about your feelings, questions and your school life.
Follow my social media to learn more about my latest information.
Instagram/Pinterest: @kenstudyjourney
Subscribe to my email newsletter if you need to receive my latest articles and news.

Your comment has been posted successfully, but it needs to be audited by myself artificially to prevent spam and negative comments.
Please wait for a few days. You will receive an email once your comment has been replied.